
We have installed an Epson multi-function printer. It connects by WiFi, so the only connecting cable is the mains one. It can be unplugged and re-sited anywhere in the shed.
The printer is sensitive to dust, so should be covered with a dust sheet if there is a likelihood of dust in the area around the printer.
This note describes some basics about how to use the printer to print, copy or scan documents. Click any of the headings below to find out more. Some sections contain images - you can usually click them to see a larger version. Note that we have not connected the printer as a fax machine.
If you need more help than we provide here, there is a user guide for the printer here. If you still need help, please get in touch with Andy Henderson and he'll try to arrange something for you.

If you're already familiar with multi-function printers
You'll find very little here that's new to you. Most printers work in a similar way even if they come from different manufacturers.
It would be worth skimming through the following sections, though, in case there are some features you are unaware of.
Switch on
The control panel is at the front of the printer. Pull it gently from the bottom to hinge it out making it easier to see.
![]() Press the power button at the top left of the control panel. The display screen will light up. If nothing happens, check the printer is plugged in and switched on at the wall socket.
Press the power button at the top left of the control panel. The display screen will light up. If nothing happens, check the printer is plugged in and switched on at the wall socket.
Note that it can take a while for the printer to warm up.
Switch off
![]() Press the power button at the top left of the control panel to start the shut down process. The display screen asks you to confirm by pressing the OK button. Please do not switch off at the wall socket or disconnect until the power light goes out. The printer needs time to cap the ink cartridges so they don't dry out.
Press the power button at the top left of the control panel to start the shut down process. The display screen asks you to confirm by pressing the OK button. Please do not switch off at the wall socket or disconnect until the power light goes out. The printer needs time to cap the ink cartridges so they don't dry out.
Please:
- If you have been copying or scanning, remove your original from under the document cover.
- Remove paper from the feeder and replace it in the packet. Leaving paper in the printer causes it to curl and can cause a paper jam.
- Fold the control panel away by pressing gently at the bottom of the panel.
- Fold the front and rear paper trays away to minimise the risk of dust entering and clogging the printer.
While there is still work needing to be done in the shed, we have provided a dust cover, please use it to cover the printer and paper when not in use.
Loading paper
Start by opening the feeder guard and pulling up the paper support...
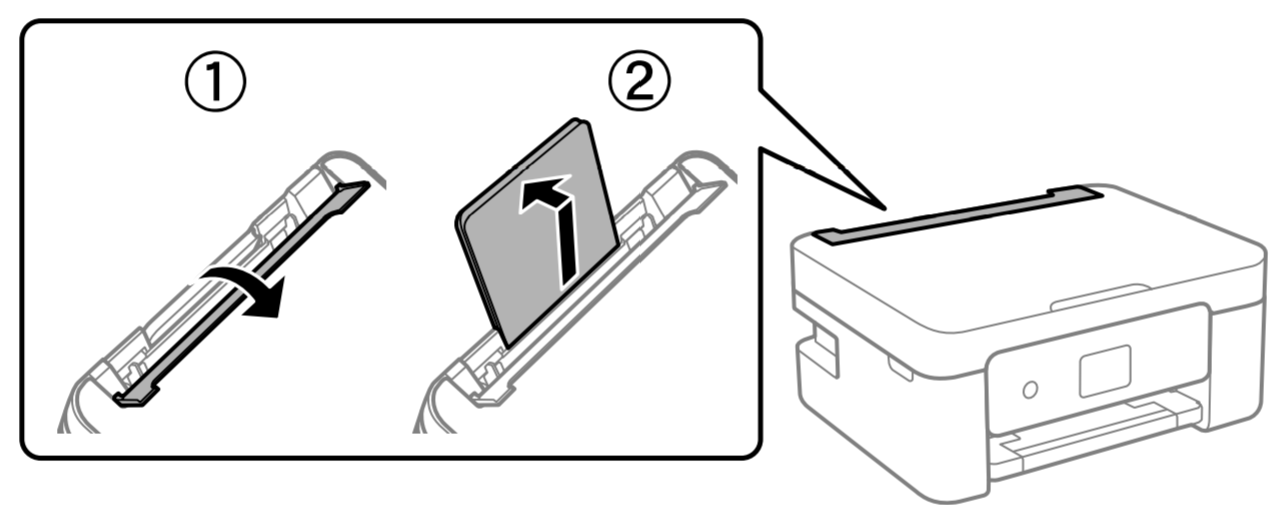
Slide the paper guides open...
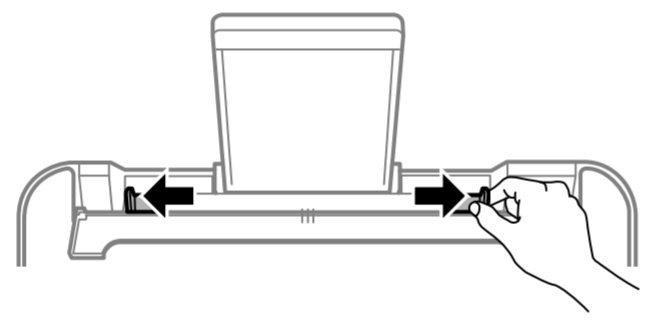
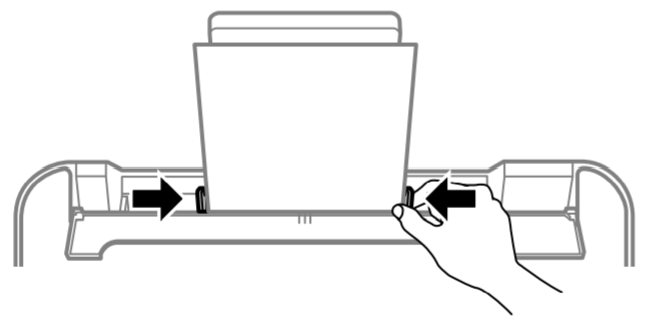
Insert paper centrally - it should fall easily into the printer mechanism...

Close the paper guides so they are snug against the sides of the paper - but not gripping or bending it. Then fold the feeder guard back into place...
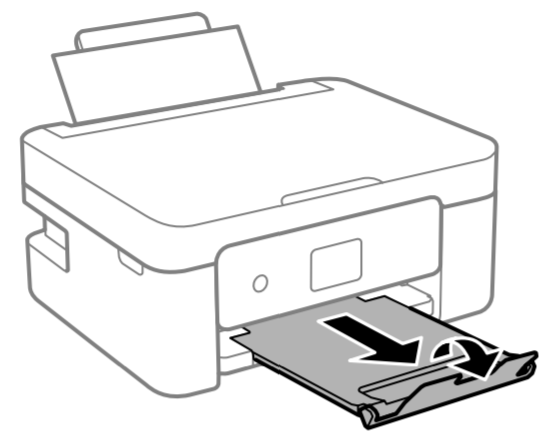
Finally, slide out the front paper tray...
Print from the Shed laptops
We have named the printer "Mens Shed printer" and made it the default device.
You should be able to use any program's print feature without any further interaction once the printer has been switched on.
The printer is capable of double-sided printing. Please consider using this feature to save paper if printing more than one page. You should see an option to print single or double-sided in your program's print window (you might need to click a 'Printer properties' or 'Advanced' button).
You won't normally see the printer's network name but, in case you do, it identifies as: 'EPSON WF-2810 Series'.
Copy a document
Make sure the printer is switched on.
Lift the document cover to reveal the glass...

If necessary, clean the glass with a clean, dry cloth.
Place your document face down on the scanner glass, pushing it to the left hand corner nearest the control panel. The top of your document should point to the right.
Close the cover gently.
Press the left or right arrow buttons on the control panel until the display screen shows 'Copy' and press 'OK'. Follow the prompts to set:
- Number of copies
- Colour or monochrome copies
- Press OK to see additional settings
- Press OK again then the copy button:
 to start your copy.
Scan a document
Make sure the printer is switched on.
Lift the document cover to reveal the glass...
If necessary, clean the glass with a clean, dry cloth.
Place your document face down on the scanner glass, pushing it to the left hand corner nearest the control panel. The top of your document should point to the right.
Close the cover gently.
At one of the laptops...
- Type "scan" in the toolbar search box, to see 'Windows fax and scan', select it (there are a bunch of different ways to open the scan app, if you prefer a different method, go for it).
- Click 'New scan' at the top left of the window.
- Use the dropdown at the left of the new scan window to select from 'Color', 'Grayscale', or 'Black and white'.
- Click 'Preview' to see a small version of your scanned image; if it needs repositioning, do that and click 'Preview' again; when you are happy...
- Click 'Scan'.
Your scanned document is stored automatically in folder 'Scanned documents' in the 'Documents' folder.
Paper selection
You might be asked to confirm paper settings when changing paper. When using normal printer paper, select Plain A4 and press OK.
Please use sparingly
Printer ink is indecently expensive so please use the printer only when you need to. In practice it is easier to read most documents via the laptops because that allows you to increase print size if necessary.
For the time being we are not asking for contributions when printing documents assuming we won't need to replace the cartridges frequently. That might need to change if the printer gets used a lot.
Replacing cartridges
You might see a warning that ink in a particular cartridge is low. That's not a cue to replace the cartridge - it still has ink in it. Instead, please check to see if we have a replacement cartridge of the relevant colour. If not, let Andy Henderson know so he can source a replacement.
If a cartridge is empty, there are instructions for replacing it in the user manual starting at page 140. Alternatively, let Andy Henderson know so he can do the replacement.
Not genuine Epson cartridges
You might see dire warnings because we are not using genuine Epson cartridges. You can safely ignore/override them.
Can't print from the laptops
Try both laptops. If just one has a problem, it's a setup issue in the failing laptop. Otherwise, there are a number of reasons why you might be unable to print from one of our laptops:
- The printer is not switched on
- The printer has run out of paper
- One of the cartridges has run out of ink (see above)
- There has been a paper jam (should be a message on the printer display)
- The printer is not connected to our network (the wifi icon on the printer display should be blue)
- The printer is connected to the wrong network; the 'HIMS Visitor' network cannot connect to our main network, the printer must be connected to the 'Mens Shed Assoc HI' network